Scenario Manager
Scenarios apply initiatives and drivers to model your institution's finances if the assumed growth rates and programs were implemented. Your existing scenarios are displayed in the Scenario Manager. The Scenario Manager utility allows you to create scenarios, delete scenarios, group scenarios, delete groups, clone scenarios, and sync scenario data to historical actual data. This topic walks you through the process for each of these tasks.
To open the Scenario Manager, click the Scenarios tab.
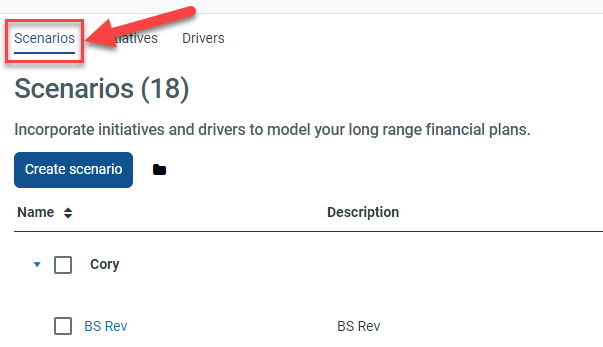
Example of Scenario Manager link location
Scenario Manager overview
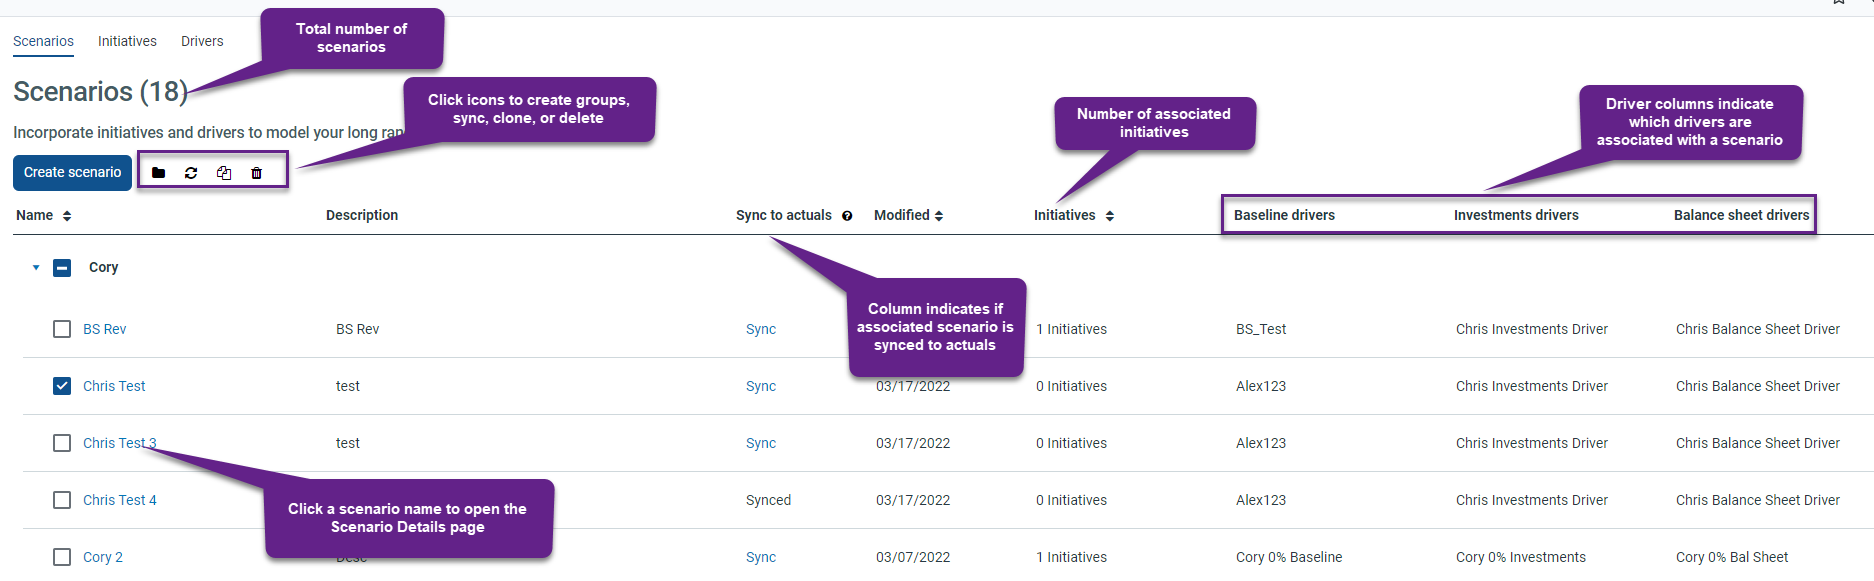
Depending on the scenario(s) or group(s) you have selected in the Scenario Manager, you will see the following task icons in the upper-left of the page.
| Icon | Description |
|---|---|

|
Create new scenario group icon. This icon always displays. |

|
Sync scenario(s) to historical actuals icon. This icon displays if you click the check box for a scenario that is unsynced, even if you have clicked the check box for a synced scenario also. |

|
Clone icon. This icon displays if you click the check box for a single scenario only. |

|
Delete icon. This icon displays if you click the check box for any scenario(s) or group(s). |
Creating scenarios
To create a scenario:
- In the upper-left, click Create Scenario.
- On the Create Scenario page, on the Basics tab, in the Name text field, enter a scenario name. The name must be unique.
- In the Description text field, enter a description for your scenario.
-
Click the Group drop-down to select a group to associate with the scenario. If a relevant group does not exist, click Create Group to create a new group. The scenario will display in the Scenario Manager as part of the associated group.
- Click the Baseline driver drop-down to select a baseline driver to apply to your scenario.
- Click the Investments driver drop-down to select an investments driver to apply to your scenario.
- Click the Balance sheet driver drop-down to select a balance sheet driver to apply to your scenario.
- Click Select initiatives to select one or more initiatives to apply to your scenario.
NOTE: This is an optional step.
- In the Select Initiatives dialog that displays, click the check box associated with one or more initiatives.
- Click Select.
- Click Create scenario.
The newly created scenario will display and be open to the Baseline tab by default.
Creating and managing scenario groups
Scenarios are combined into groups. Groups allow you to organize scenarios into sets. For example, you may want to organize multiple scenarios related to the creation of a new nursing program into a single group of scenarios for the nursing program.
Click the arrow in the Name column to expand the associated group and view the scenarios within it.
You can create a new group anytime in the Scenario Manager.
To create a scenario group:
-
On the Scenarios tab, click the folder icon.
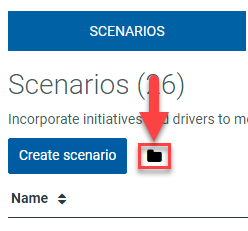
- In the Create a Group dialog, in the Name field, type a name for your group. The name must be unique.
- Click Create.
You will also have the option to create a new group from the Group drop-down when creating or cloning a scenario.
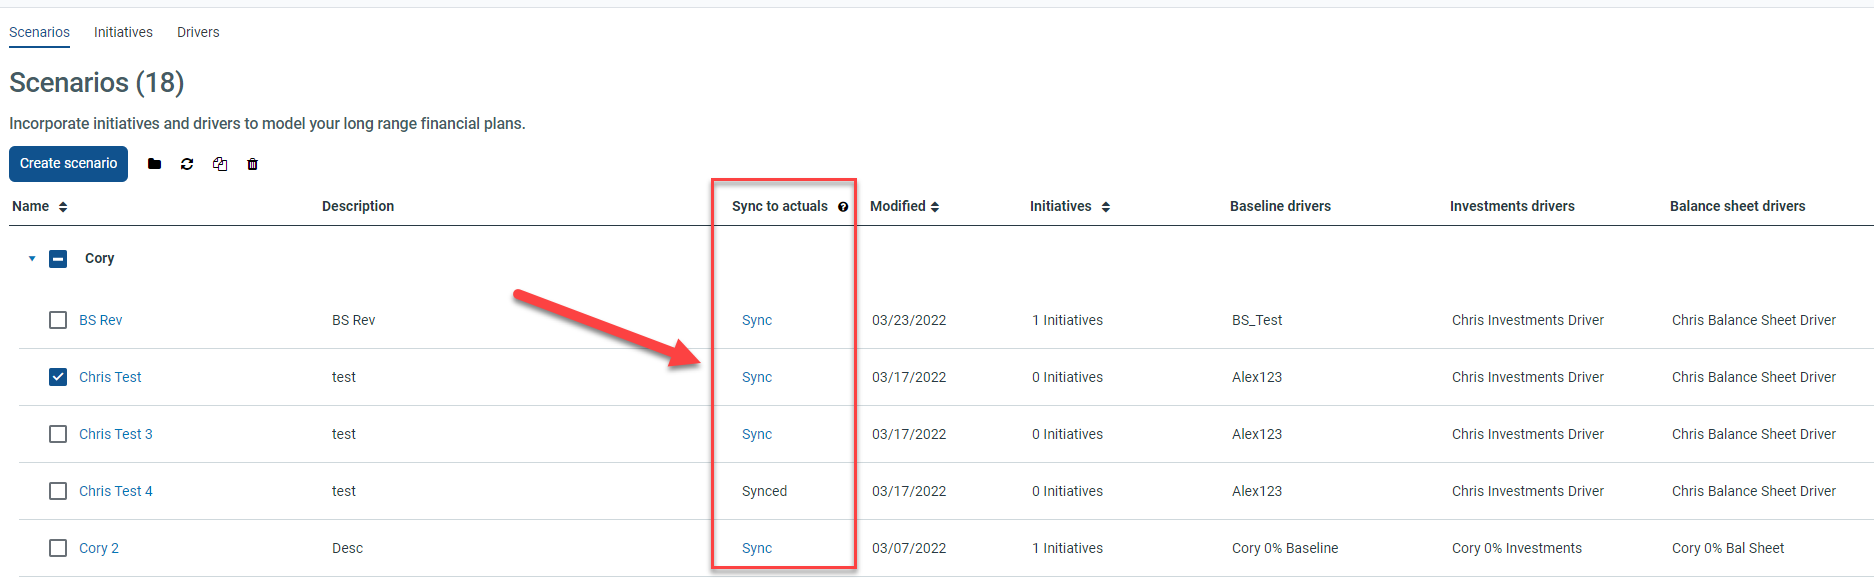
Syncing scenarios to actuals
The data synchronization status for each scenario is displayed in the Sync to Actuals column. If a scenario's data is Synced, this indicates that the scenario data is based off the most current assumptions from the baseline budget.
If the scenario data is unsynced, this indicates that the baseline budget data has changed and that the scenario is operating off of previously applied assumptions that may be outdated. For example, new historical data may have been uploaded to Axiom after the scenario was created. In this case, you can click the Sync hyperlink to sync the scenario data to baseline assumptions. This action will overwrite all previous assumptions used by the scenario with the newest baseline data.
Cloning a scenario
Axiom Strategic Financial Planning allows you to clone a scenario. This allows you to quickly create a new scenario using the same data and settings used for an existing scenario.
To clone a scenario:
- In the Name column, click the check box to select the scenario you want to clone.
- Click the clone icon in the upper-left.
- In the Clone dialog, do the following:
- In the Clone Name text field, type in a unique name for the scenario. This name cannot be the same as another scenario.
- In the Clone Description text field, type in a description for the scenario.
- Click the Group drop-down to assign the clone to a group. Or, in the drop-down, click Create New to create a new group for the clone
- Click Clone.
A cloned scenario will have the same initiatives assigned to it that were assigned to the original scenario that you created the clone from. To change the assigned initiatives, see The Scenario Details page.
Deleting scenarios or groups
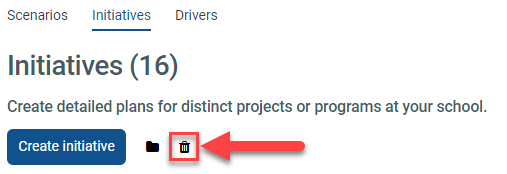
To delete a scenario or scenario group:
-
On the Scenarios tab, click the square in the Name column to select the associated scenario or scenario group.
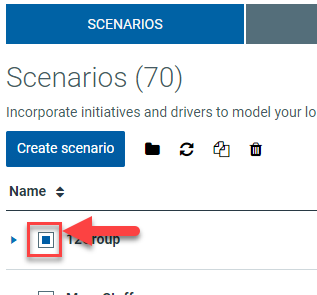
IMPORTANT: If you delete a scenario group, Axiom Budgeting will delete all scenarios within that group.
-
Click the trash can icon.
- In the Confirm delete dialog that displays, click Delete.
